 |
|
Olympus Mons Class and Reid Fleming Class
![]() Overview
Overview![]()
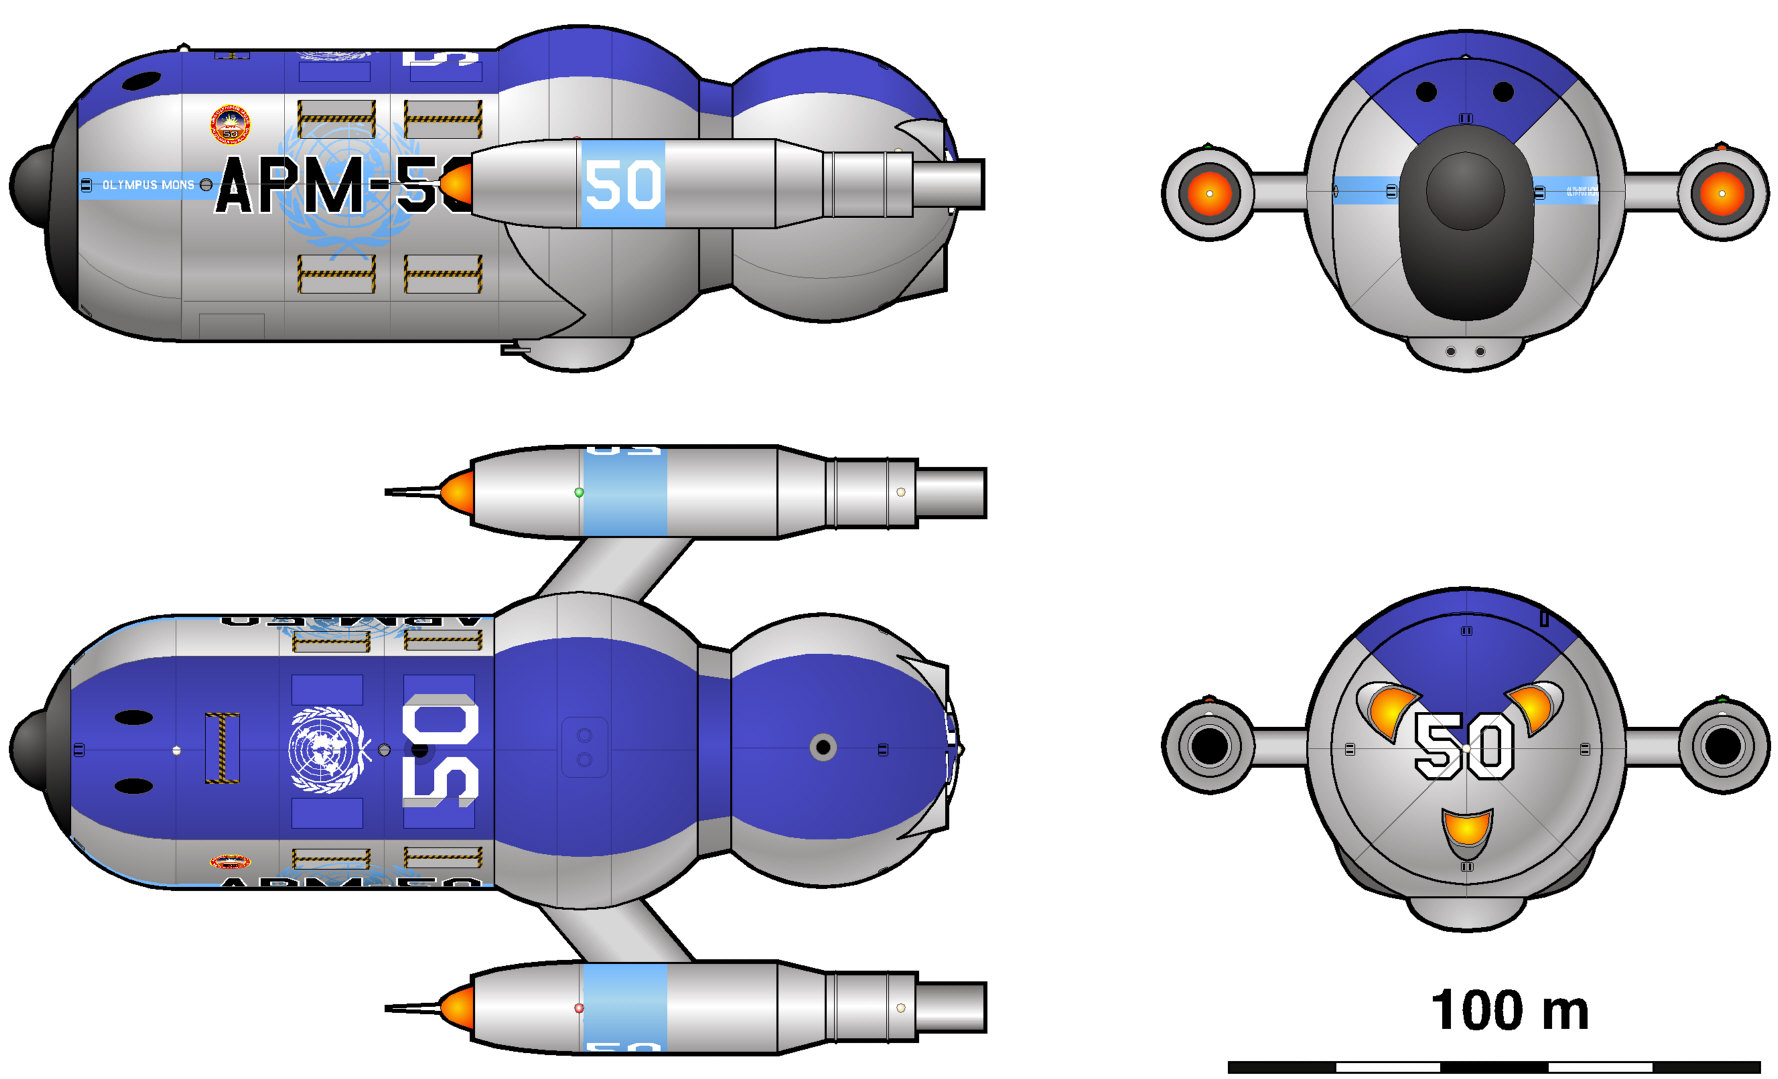 Olympus Mons class 5 views |
 Olympus class in UFP markings |
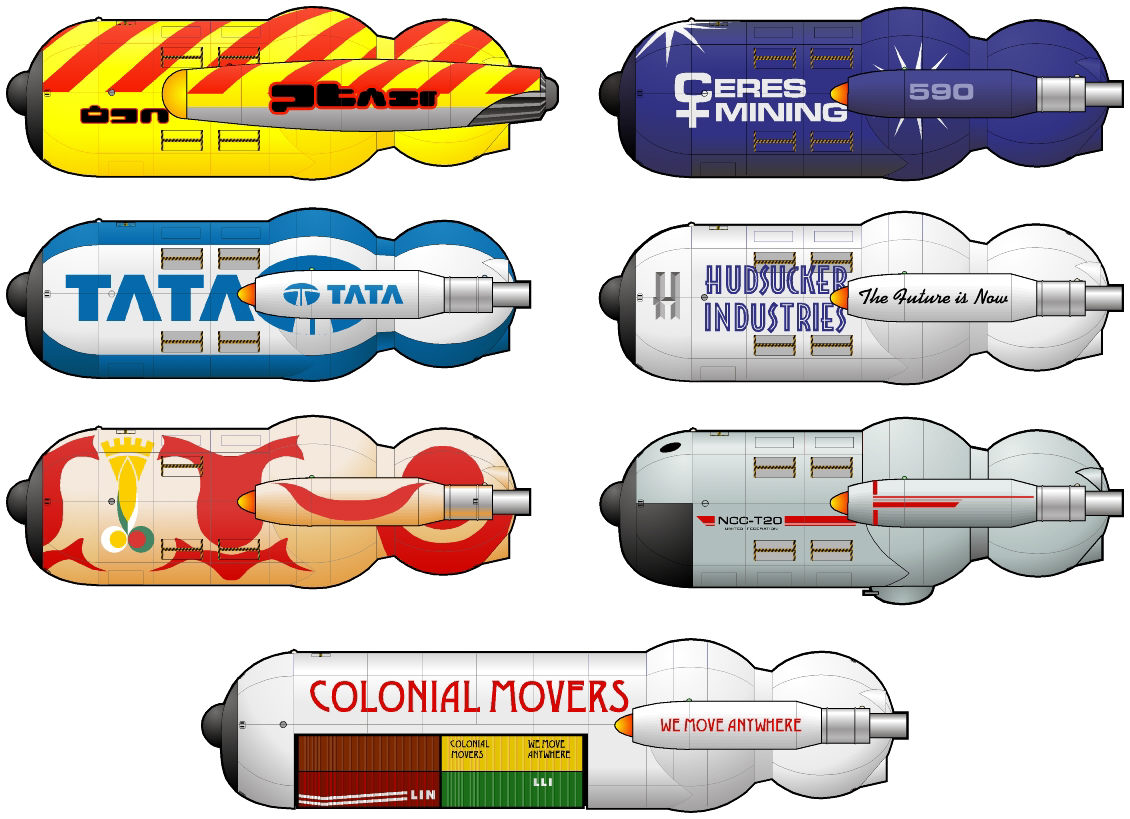 Different liveries |
 Olympus Mons deck plans, part 1 created by Allen Rolfes (see notes) |
 Olympus Mons deck plans, part 2 created by Allen Rolfes (see notes) |
|
 Munitions ship plans, part 1 created by Allen Rolfes (see notes) |
 Munitions ship plans, part 2 created by Allen Rolfes (see notes) |
|
 Troop transport plans, part 1 created by Allen Rolfes (see notes) |
 Troop transport plans, part 2 created by Allen Rolfes (see notes) |
|
 Reid Fleming side view |
 Reid Fleming deck plans, part 1 created by Allen Rolfes (see notes) |
 Reid Fleming deck plans, part 2 created by Allen Rolfes (see notes) |
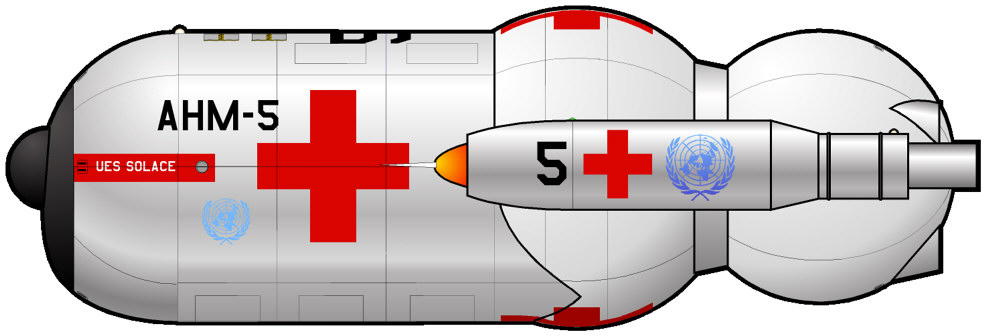 Mercy hospital ship |
 Mercy deck plans, part 1 created by Allen Rolfes (see notes) |
 Mercy deck plans, part 2 created by Allen Rolfes (see notes) |
![]() Scenes
Scenes![]()
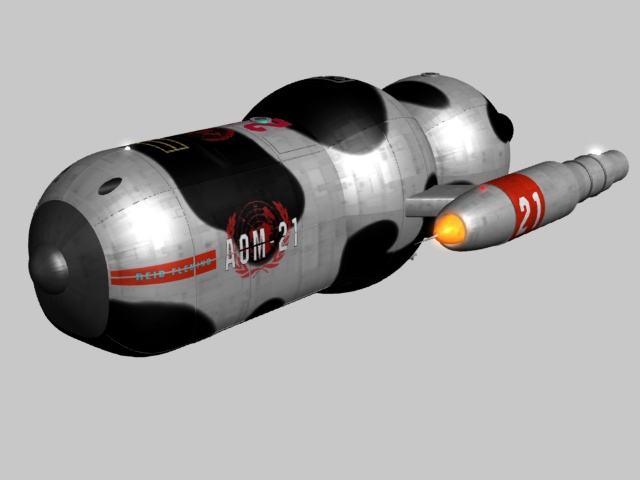
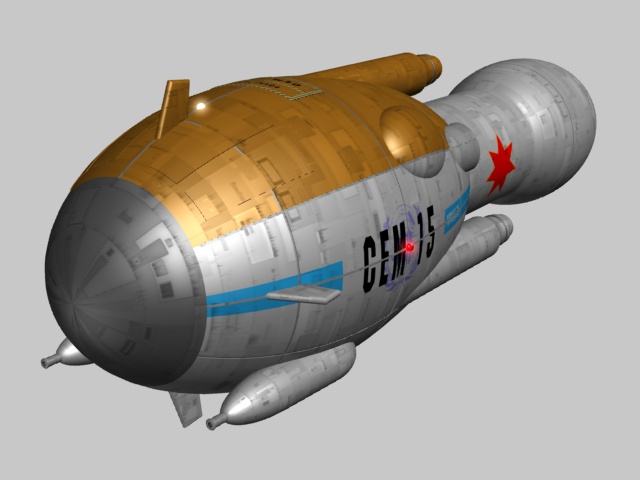
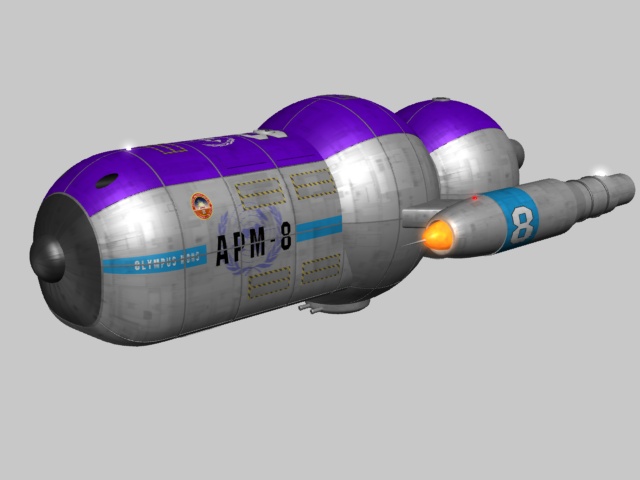 Olympus Mons 3D model created by Fabio Passaro © 3D Gladiators |
 Reid Fleming 3D model created by Fabio Passaro © 3D Gladiators |
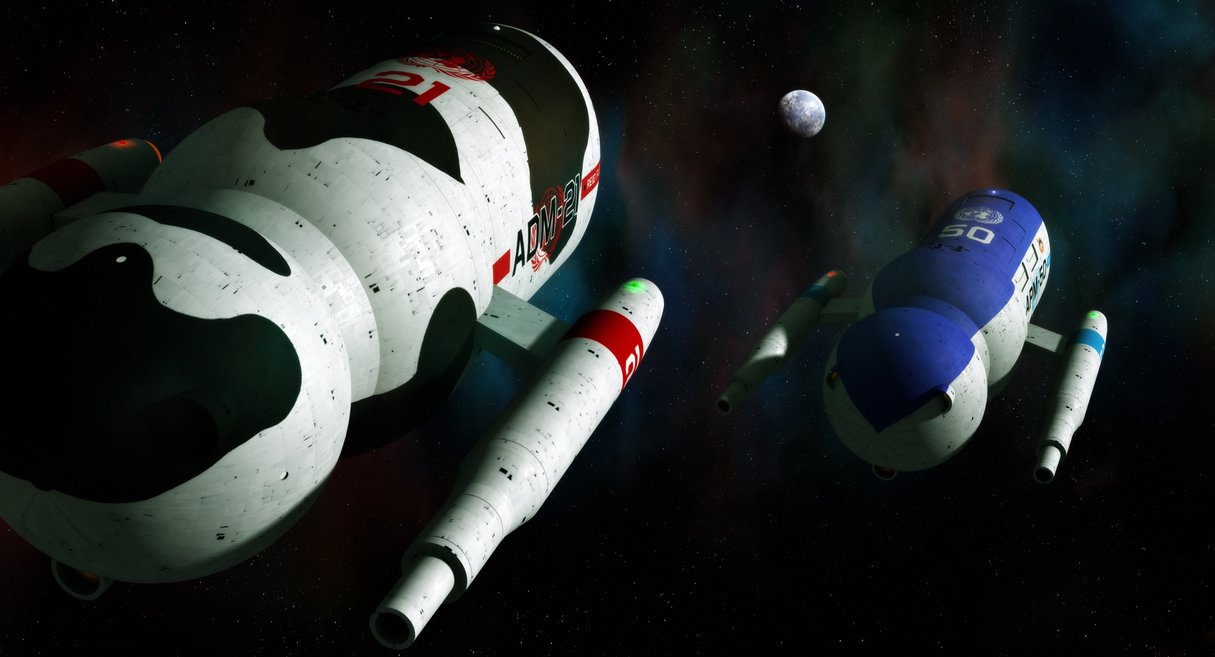 Supply lines created by Dávid Metlesits |
![]() History
History![]()
Even before the UE went on the offensive in 2158, a fast, reliable logistical trail was needed to prosecute the war. With the successful introduction of M/AM reactors aboard the Krechet- and Tannhäuser-class cruisers, faster transports were needed to move personnel and materiel from the core worlds to the front lines. The Olympus Mons-class combat transports (APM-50) marked a return to the original cargo-carrying configurations of the Bison hull.
The M/AM reactor presented a clear advantage in logistics: faster delivery, more cargo as a percentage of weight, and lower deuterium requirements. Ships equipped with the SSWR-III-C M/AM reactor had greatly reduced transit times compared with fusion-powered ships, enabling the full capacity of Earth's industrial base to reach the front lines in a timely manner. Rather than a high burst speed of the previous reactors, the SSWR-III-C was built to provide sustained, moderately high speeds.
![]()
Like its Bison predecessors, the Olympus Mons was highly configurable. Hulls could be customized to carry personnel, bulk cargo, replacement parts, munitions, and assault troops and landing craft. Specialized variants of Olympus Mons—the Reid Fleming-class deuterium tankers (ADM-21) and the Mercy-class hospital ships (AHM-5)— were also constructed. A single Olympus Mons transport could carry enough cargo to resupply an entire task force, or a full battalion of ground soldiers with their equipment and vehicles. A Reid Fleming tanker carried enough deuterium to refuel 2 Yorktown-class carriers and their escorts.
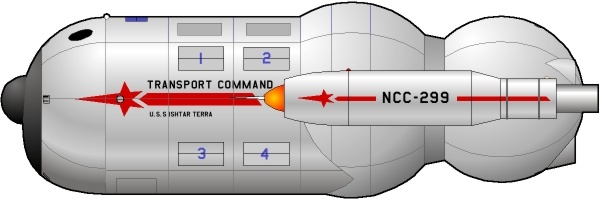
After the war, when the UESN transformed into the more peaceful Federation Starfleet, a large number of surplus ships were sold off to private interests. Marketed as the Baby Bison, these new, fast transports started an economic boom as worlds previously out of reach were settled, and existing colonies grew rapidly as more ships brought people and equipment from the core worlds. Olympus Mons also continued to serve with the new Starfleet's Transport Command. They were used to set up the new common infrastructure of the Federation—starbases, border monitors, fuel stations, and spacelane marker buoys. However, as newer ships entered service (most notably the Constellation class of 2180), Olympus Mons was gradually relegated to lower-priority roles. With reactor and nacelle upgrades, Olympus Mons remained in service with Starfleet until the 2230s.
![]()
The Olympus Mons-class combat transport UES Ishtar Terra (APM-59) and the Reid Fleming-class deuterium tanker UES DeMarco (ADM-35) are on display at the Starfleet Museum.
![]() Commissioned Ships
Commissioned Ships![]()
| UES Olympus Mons APM-50 UES Chomolungma APM-51 UES Denali APM-52 UES Kilamanjaro APM-53 UES Mauna Loa APM-54 UES Suribachi APM-55 UES Galaxius Mons APM-56 UES Fuji APM-57 UES Matterhorn APM-58 UES Ishtar Terra APM-59 UES Mount Etna APM-60 UES Eiger APM-61 UES Ra Patera APM-62 UES Pavonis Mons APM-63 UES Xanthe Terra APM-64 UES Mount Cuba APM-65 UES Krakatoa APM-66 UES Ascraeus Mons APM-67 UES Aphrodite Terra APM-68 UES Coprates APM-69 UES Thera Macula APM-70 UES Ceres APM-71 UES Syria Planum APM-72 UES Montes Haemus APM-73 UES Mont Blanc APM-74 UES Cho Oyu APM-75 UES Elysium Montes APM-76 UES Vesta APM-77 UES Guallatiri APM-78 UES Colima APM-79 |
UES Agiocochook APM-80 UES Qogir APM-81 UES Eros APM-82 UES Aonia Terra APM-83 UES Montes Alpes APM-84 UES Aconcagua APM-85 UES Erebus APM-86 UES Apis Tholus APM-87 UES Echion Linea APM-88 UES Annapurna II APM-89 UES Stromboli APM-90 UES Tharsis Montes APM-91 UES Himalchuli APM-92 UES Golem Korab APM-93 UES Pico del Teide APM-94 UES Elbrus APM-95 UES Vesuvius APM-96 UES Theia Mons APM-97 UES Kamet APM-98 UES Anala Mons APM-99 UES Makalu APM-100 UES Ben Nevis APM-101 UES Zugspitze APM-102 UES Gibraltar APM-103 UES Rainier APM-104 UES St. Helens APM-105 UES Var Mons APM-106 UES Sinai APM-107 UES Kungur APM-108 UES Grossglockner APM-109 |
|
|
UES Reid Fleming ADM-21 |
UES Payne ADM-29 UES Evans ADM-30 UES Robinson ADM-31 UES Tucker ADM-32 UES Williams ADM-33 UES Leyburn ADM-34 UES DeMarco ADM-35 |
|
| UES Mercy AHM-4 UES Solace AHM-5 UES Comfort AHM-6 UES Sanctuary AHM-7 |
UES Consolation AHM-8 UES Refuge AHM-9 UES Hope AHM-10 UES Tranquility AHM-11 |
![]() Specifications
Specifications![]()
Standard displacement: 411,337 t
| Overall | 1° Hull | 2° Hull | Nacelles | |
| Length [m] | 182.19 | 91.36 | 90.83 | 112.64 |
| Beam [m] | 113.81 | 54.09 | 59.74 | 17.96 |
| Draft [m] | 64.32 | 54.09 | 64.35 | 17.96 |
Crew complement: 806 (80 officers +
726 crew)
Weapons: 2 missile launchers with 16 Viper area-defense missiles, 2 Type VII laser cannons (1 × 2 turret)
Embarked craft: 12 cargo/personnel shuttlecraft, 4 heavy cargo shuttlecraft
Warp drive: SSWR-III-C spherical cavity M/AM reactor with 2 Jaguar IIIa warp nacelles
Velocity: wf 2.9, cruise; wf 3.3, supercruise; wf 3.4, maximum
Units commissioned: 83 (all types)
![]()
![]()
| Last modified: 04.06.15 |